


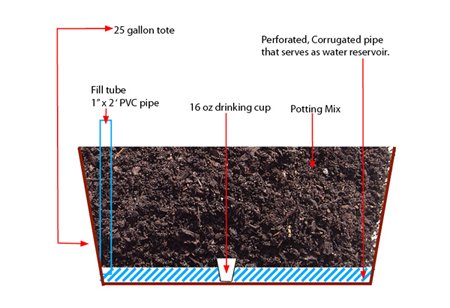
Building a 25-gallon sub-irrigated tote
This is v2 of the sub-irrigated tote. This one is very simple and easy to build. You could build a couple of them in a few hours. The link of the right has a step-by-step instruction in a easy to use PDF format that you can download.
You will need:
- One 25-gallon tote with lid
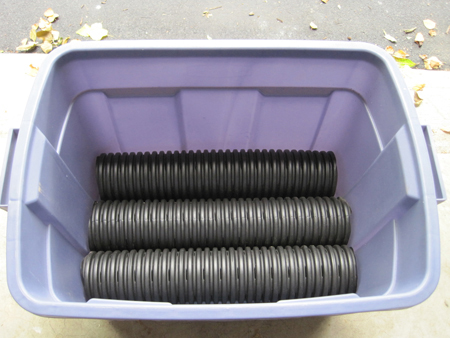
- 1 Perforated corrugated pipe 4” x 10’
- 1” diameter PVC tube 2 feet in length
- One 16 oz disposable drinking cup
- 1-2 cubic feet potting mix (not soil)
- Organic fertilizer (7-7-7 or 10-10-10) 2 cups
- If you are growing tomatoes you will need 1-2 cups of hydrated lime to prevent blossom end rot
- 1 Black garbage bag (otional, if you don't have the lid)
Cost:
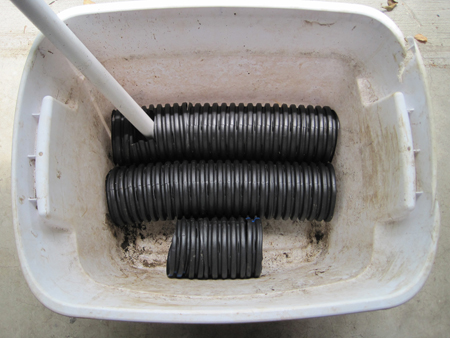
About $12-15. Cheaper if the totes are on sale. Cut the perforated corrugated pipe to fit the tote. Arrange the cut pipes inside the tote. In this case it was a nice tight fit.
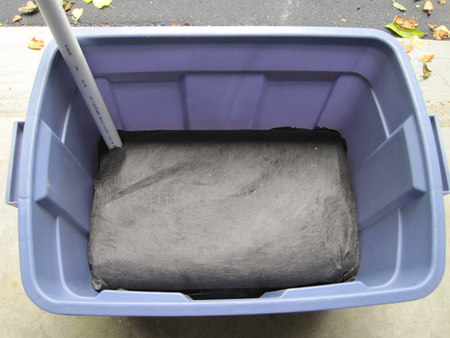
Cut one end of the 1” PVC pipe at a 45 degree angle. A hack saw or a table saw can make a clean cut. This cut is vital. It prevents loose soil and debris from clogging the fill tube.

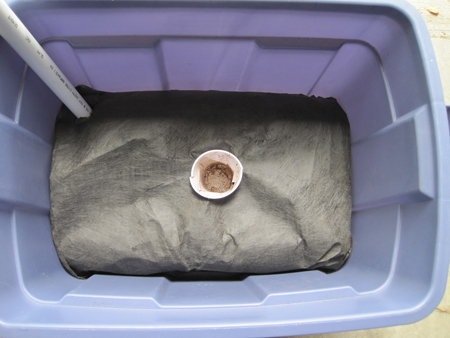
Cover the top of the corrugated pipes with landscape fabric. This prevents the potting mix from clogging the holes. Cut a 1” hole in the perforated corrugated pipe and the landscape fabric and insert the 1” PVC pipe. Insert the 45 degree end of the pipe into the corrugated pipe through the 1” hole. This tube will act as a feed tube to fill water.
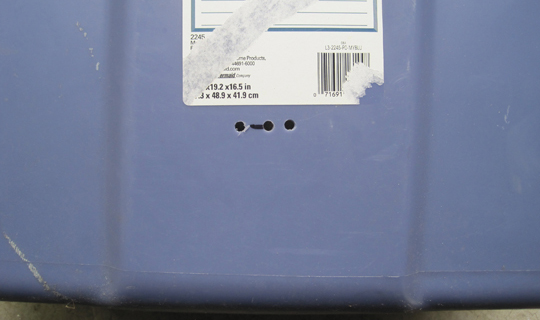
Insert 2-3 holes about 3/8” in diameter to allow for aeration and draining of excess water. This hole should be about 3.5 inches from the bottom. The calculation being the perforated, corrugated pipe is about 4.5 inches in diameter. This gives 1” space for air that will provide aeration to the roots.
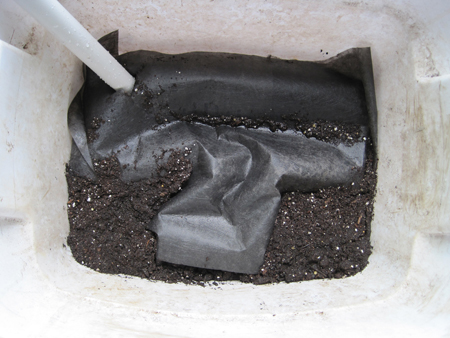
Make a hole in the corrugated pipe in the center to insert a 16 oz disposable cup. If the hole is about 3.5” then the 16 oz cup should fit snugly. Now take the 16 oz. disposable cup and make an “X” shaped cut at the bottom. Also make 4 vertical cuts of 3” on the side of the cup. It is through these cuts that water will connect with the potting mix in the tote. Insert the cup into the hole.
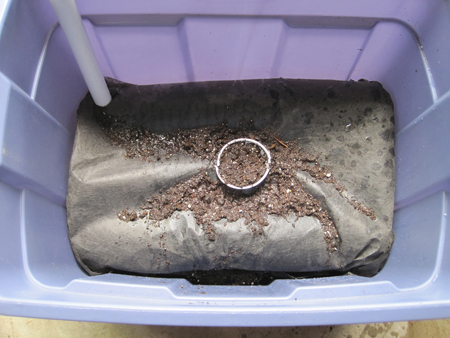
Wet part of the potting mix until it is a slurry. And fill the 16 oz disposable cup and the drain holes with this wet slurry of potting mix. Wetting the potting mix will help it cover the holes without falling to the bottom.
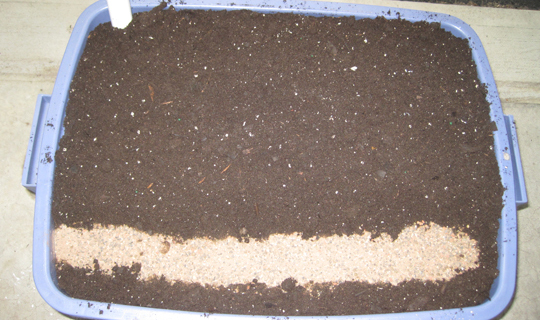
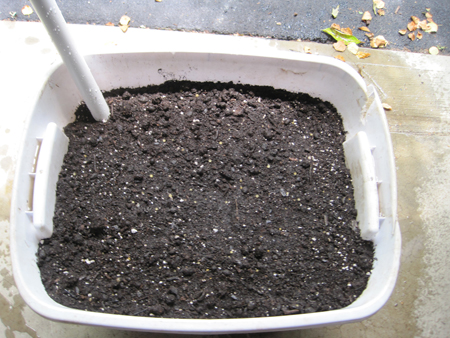
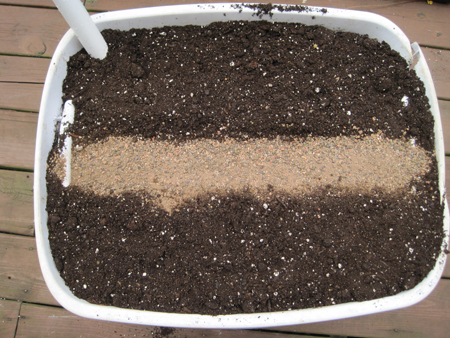
Fill to the top with potting mix. If you plan to grow tomatoes add 1-2 cups of hydrated lime when you are about half way level. Add 2 cups of 10-10-10 fertilizer strip when you are about 2” away from the top.
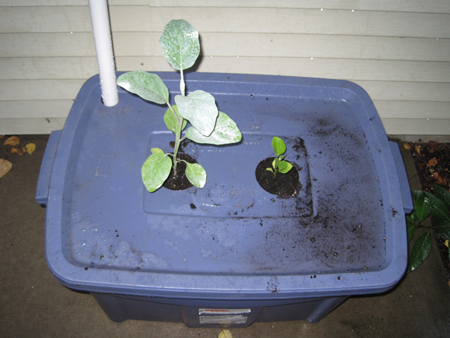
Depending on what you are going to plant make appropriate holes. In this case I made two 3.5” holes to hold eggpants. For a more detail guide on planting instruction for Totes visit http://www.abovegroundfarming.com/journal/2010/8/8/planting-guide-for-tote-sips.html
Alternate Way.
This version does away with the need for a 16 oz disposable cup. One of the performated corrugated pipe is cut short so to provide space for 2 holes. It is through these two holes that water will connect with the potting mix in the tote. Place the 1” PVC (2 feet long) tube in the 1” hole. This will act as a feed tube to fill water. Ensure the end of the pipe that makes contact with the water is cut at 45 degree angle.
Cover the pipe with landscape fabric. This prevents the potting mix from clogging the holes. Wet part of the potting mix until it is a slurry. And fill the two holes with this wet slurry of potting mix.
Insert 2-3 holes about 3/8” in diameter to allow for aeration and draining of excess water. This hole should be about 3.5 inches from the bottom. The calculation being the perforated, corrugated pipe is about 4.5 inches in diameter. This gives 1” space for air that will provide aeration to the roots. When you are half way through filling the bucket spread a cup of garden lime. You will need to do this step only if you are growing tomatoes. Garden lime helps prevent blossom end rotting that’s caused by calcium deficiency.
Now continue to fill the potting mix till you reach 2” from the top of the bucket. Add 2 cups of 10-10-10 organic fertilizer in the form of a ring around the edge of the bucket or the middle depending on what you are planting. For a more detail guide on planting instruction for totes visit http://www.abovegroundfarming.com/journal/2010/8/8/planting-guide-for-tote-sips.html
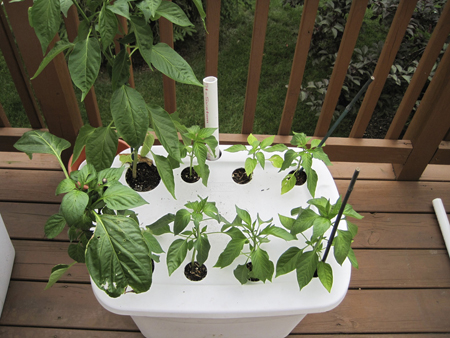
Now, fill the tote to the top with potting mix. Once filled, cover with a the lid or plastic sheet, or a garbage bag. Shown here 8 sky hot peppers I got from the farmers market. Water directly from the top only the first time around, either when planting seeds or while transplanting. Rest of the time the tote is watered through the fill tube.
 Ram G
Ram G